最近太陽哥才參加完為期兩日的「2016台灣資訊安全大會」,會後感想可以說是獲益良多。在這個日漸重視的資訊安全領域 —「弱點掃描」可以說是不可或缺的一環。尤其是當公司漸漸的小有名氣時,首當其衝「官網」就很容易被當作攻擊的主要目標,而 Vulnerability Scan 就成為防駭中很重要的一個主動屏障。
而最近哥的公司就因為老闆突然很重視這一塊,搞得我們部門和MIS部門一整個人仰馬翻。
我們言歸正傳,記得最初的文章有一篇「Nessus(一) 搞什麼!」就是先前我們介紹如何將 Nessus 測試機架設起來。事隔多年(其實才1年多) 我們這篇就是專門來介紹掃描的方法,老實說使用這Nessus 弱掃工具一點都不難,只要會用掃毒軟體就會用這個弱點掃描工具。而真正的挑戰是在掃完後的弱點分析和解決方法,這才是弱點掃描的核心價值。
依照慣例我們一樣先來張這篇的圖解大綱:

Step 1: Open a web browser and enter Nessus Server IP with Port 8834 at URL(ex.https://10.8.1.14:8834/nessus6.html#/scans) then login username and password.

Step 2: Show main console as below.

Step 3: Click
 to create a new scan.
Step 4: Select a scanner templates which want to use it.
(ex.
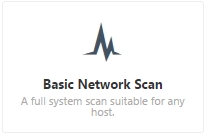 )
)
Step 5: Select General > Name(Enter target server name for identify) > Description(for more info. with target server) > Folder(for save scan items folder) > Scanner(for select scanner from local) > Targets(enter the target IP or URL, ex. 192.168.1.1-192.168.1.5, 192.168.2.0/24, test.com)

Step 6: Finally double check all items then click Save to start scan.

Step 7: Click the target name to check scanning status.

Step 8: Show the target server currently scanning detail information.

Step 9: After completed the scanning click the target for the detailed result.

Step 10: The result shows have 4 medium and 45 Info Vulnerabilities.

Step 11: For example click
 shows this vulnerability details.
Step 12: This vulnerability shows the description, solution and others.

After that reference the solution to fix this vulnerability.
Step 13: Click Hosts back to main page.

Step 14: Select Export format download to the local.

Step 15: For this case export as a PDF then select Custom.

Step 16: Click
 to continue export the report.

Step 17: Check the export PDF report(Windows_7_vnb5te.pdf) from local drive.

Step 18: Double click the PDF file to open Nessus official report with Adobe Acrobat Reader.

Congratulations!
最後終於完成這次的弱點掃描分析與如何查詢與修復方法介紹。
Nessus 基本上提供不少弱點掃描的樣本,方便讓使用者可以直接使用,同時也提供可客製化的 Policies 做為修改之用。
這套弱點掃描工具的優點是,簡單易用且可以產出清楚的報告,所以業界普遍選擇這套 Nessus 做為弱點掃描的首選。
那這節我們就先介紹到這裡,以後如果還有機會,我們可以再做深入的探討。
我們下次見~ 掰掰!
~ See you ~
參考出處:
http://www.tenable.com/